IV Help Guide

Domains and Email
Welcome to our tutorial on managing your domains and email accounts. In this section we will show you how to register a new domain, create an new email address, and setup your email on a variety of devices. To begin click the arrow next to a topic below and our visual guide will appear. To advance to the next step simply click the next button inside the appropriate box.
- From the My Account menu, click Domains and Email.
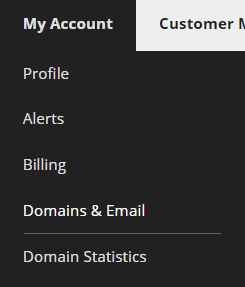
- Click Register New Domain.

- Enter the domain you would like to register, and click Check for Availability.

- If the domain is available, choose how long you want to register it for, then click Next. If the domain is unavailable, you will be offered close alternatives.

- You will be taken through a checkout process, entering your address and payment information.
- From the My Account menu, click Domains and Email.

- Check the box next to the domain you want to use, then click Manage Email Accounts.

- Click Create New.

- Enter the first part of the new Email, the Last Name, and choose the Email Type. If you chose mailbox, then you will need to enter a password. If you chose forwarder, you will need to enter another email for it to Forward To.
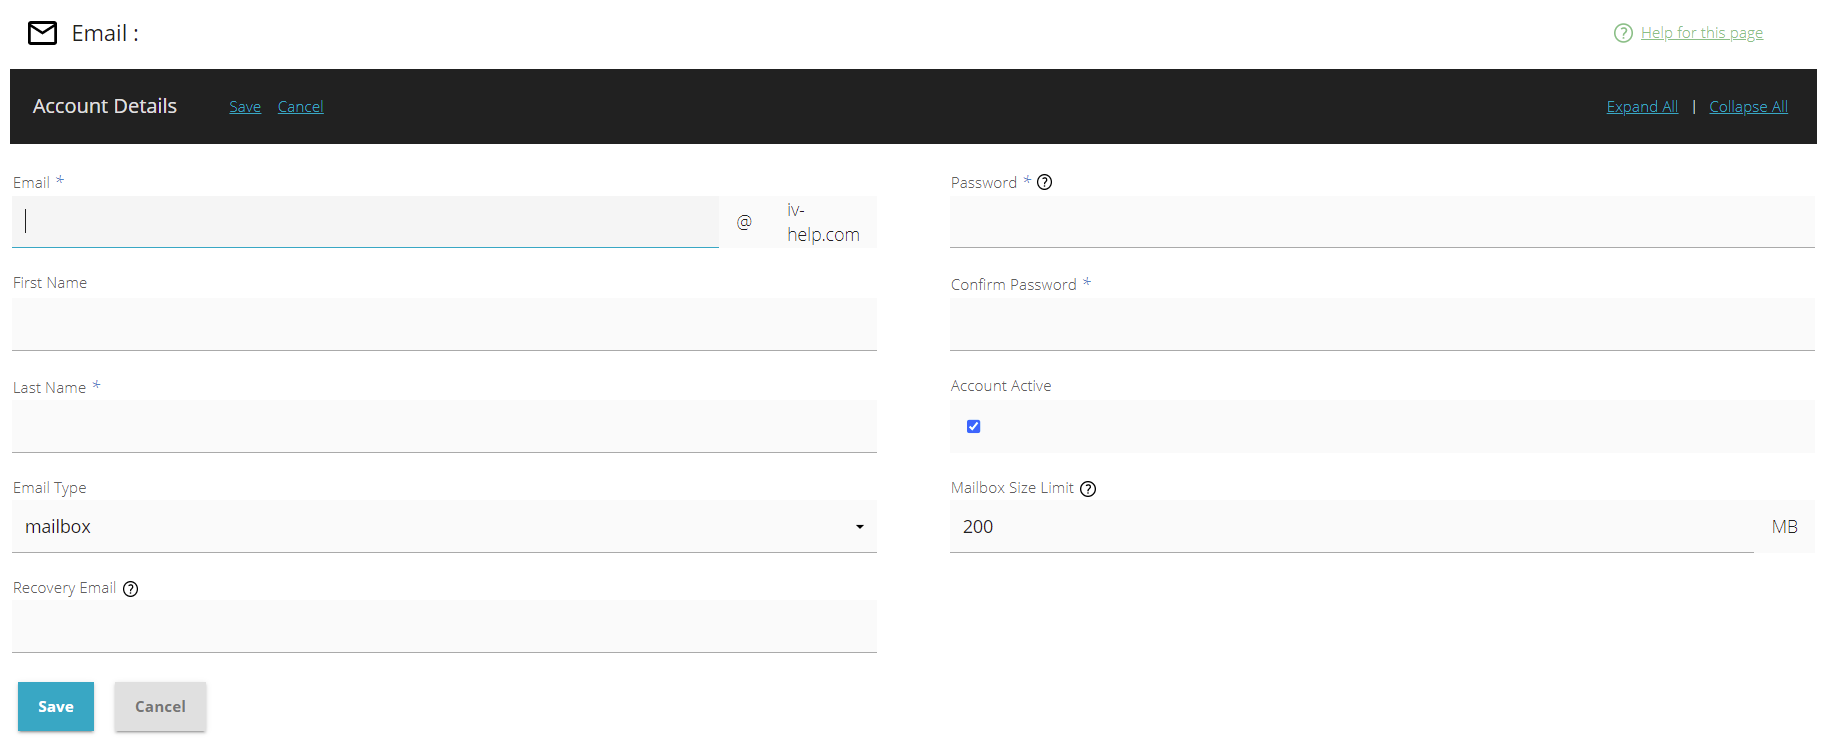
- When you are finished, click Save.
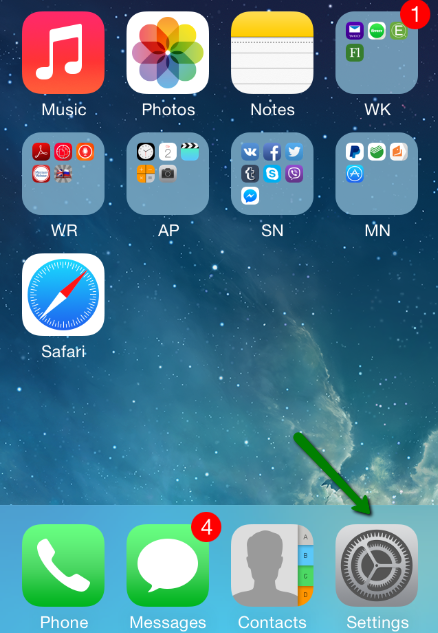
- Select Settings from the home screen of your iPhone.
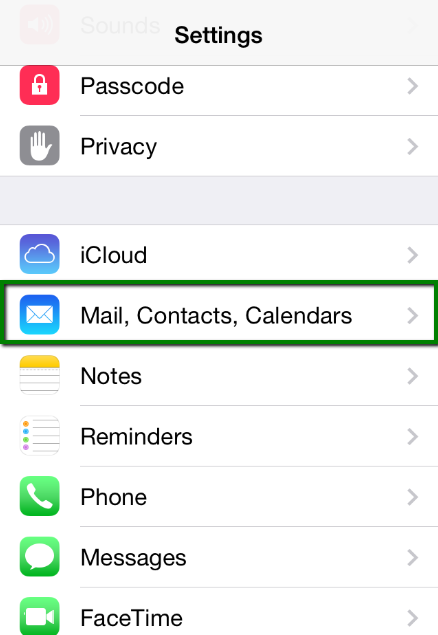
- Choose Mail, Contacts, Calendars.
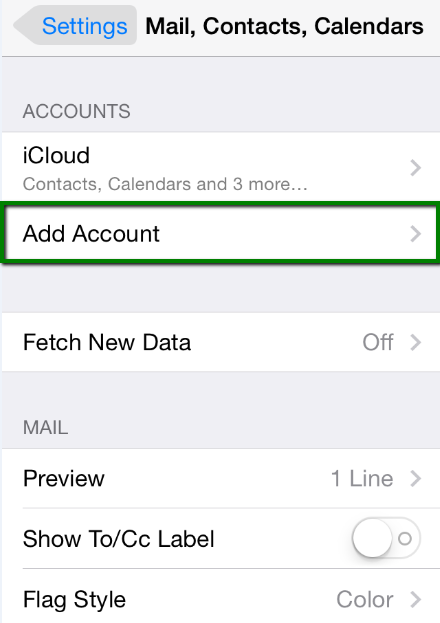
- Click Add Account.
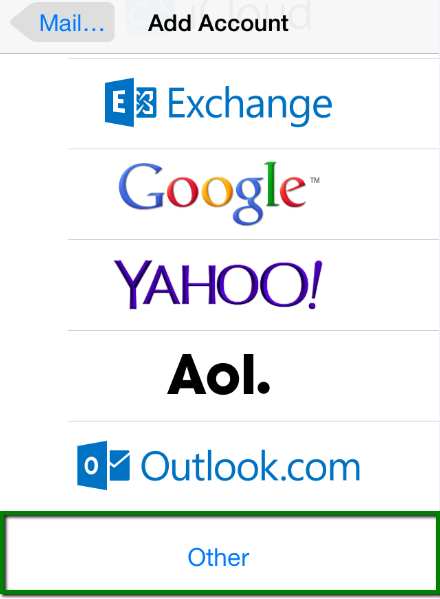
- Choose Other.
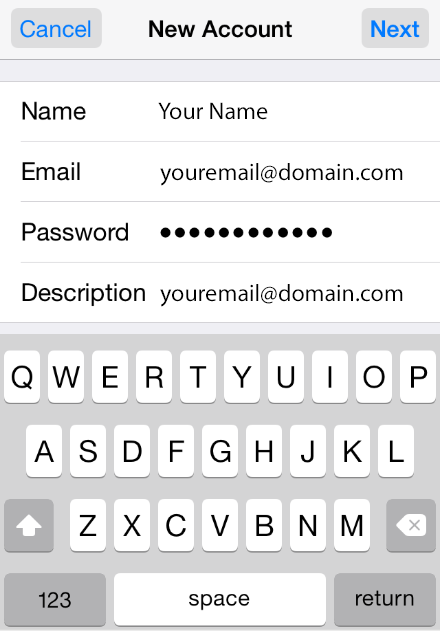
- Select Add Mail Account. In the New Account menu, you will need to specify your Name, Email, and Password. For Description, we suggest entering your email again. Click Next.
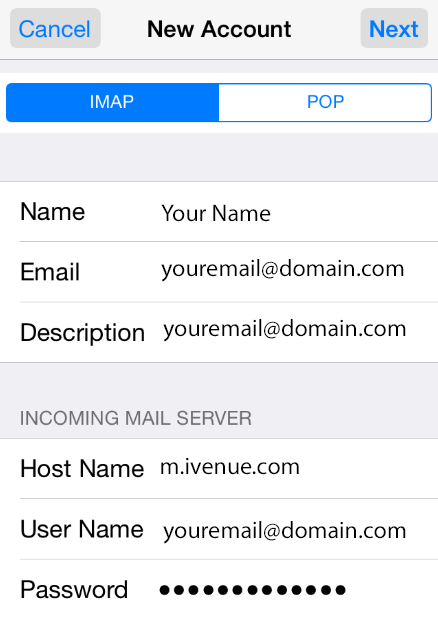
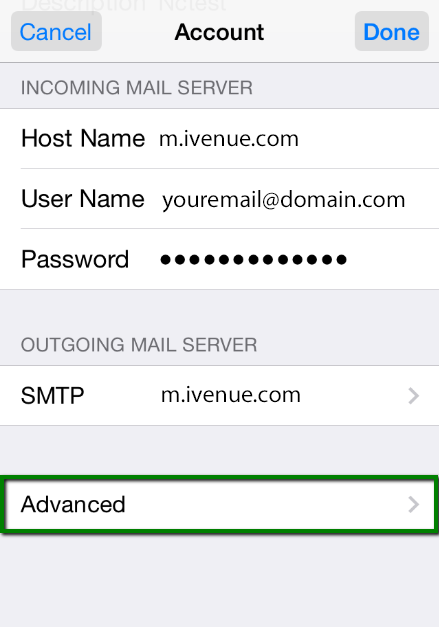
- Select IMAP. The Name, Address, and Description should already be filled in. For both Incoming Mail Server and Outgoing Mail Server, Host Name is m.ivenue.com. User Name is your email address.
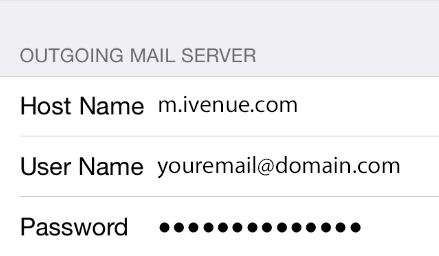
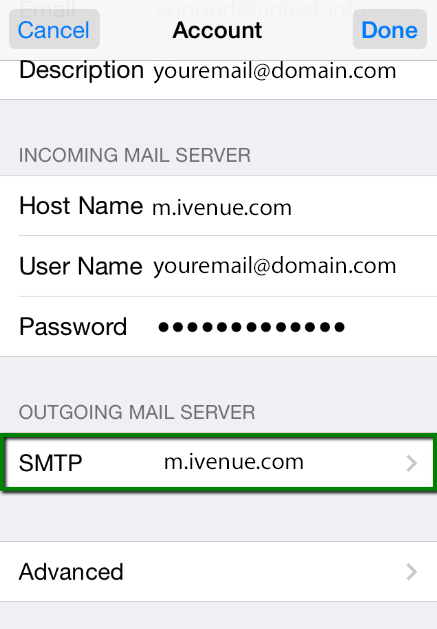
- Enter the same settings in Outgoing Mail Server.
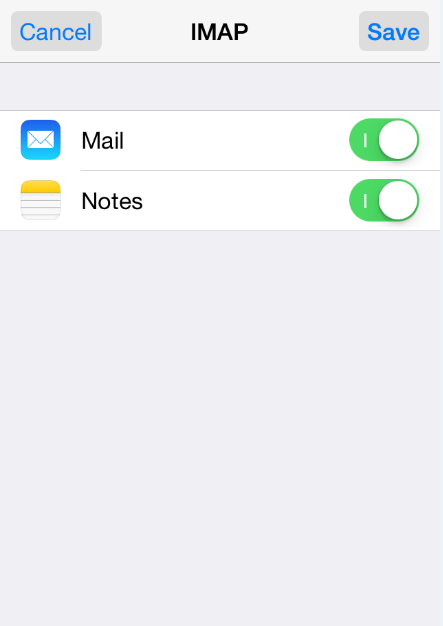
- You can enable the Mail and Notes services. Click Save and wait while the system completes necessary checks.
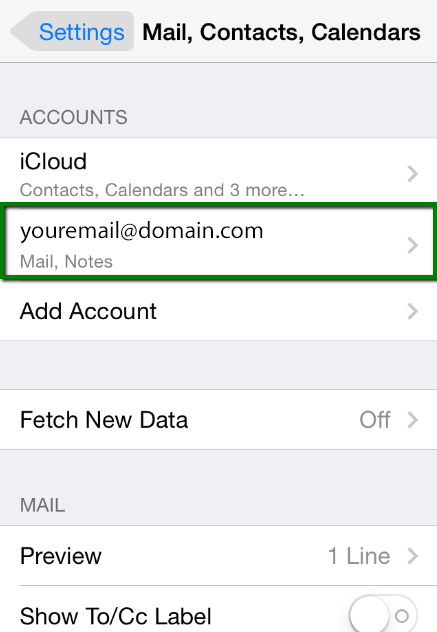
- When the checks are finished, you'll be sent to the Mail, Contacts, Calendars screen. Choose the account you just created.
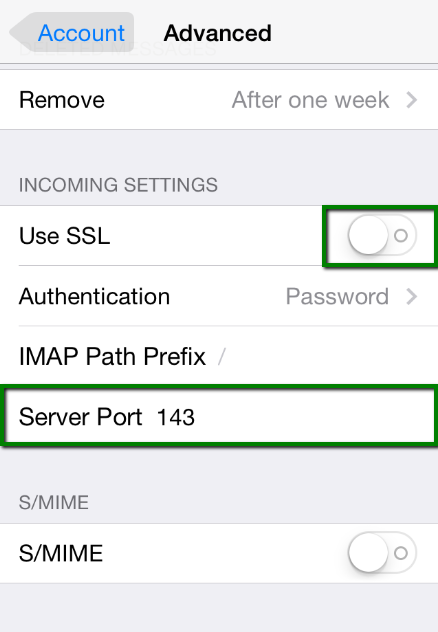
- Scroll down and choose Advanced.
- Use SSL should be disabled, and Server Port should be 143.
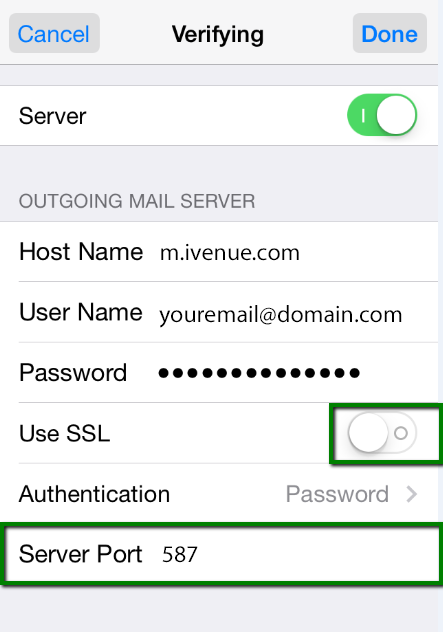
- To set up additional settings for the outgoing server, return to the previous menu and select the Outgoing Mail Server.
- Use SSL should be disabled, and Server Port should be 587.
- When you are finished, click Done. The settings will verify, and your account will be ready to use.
- Select Settings on your Android device and tap Account.
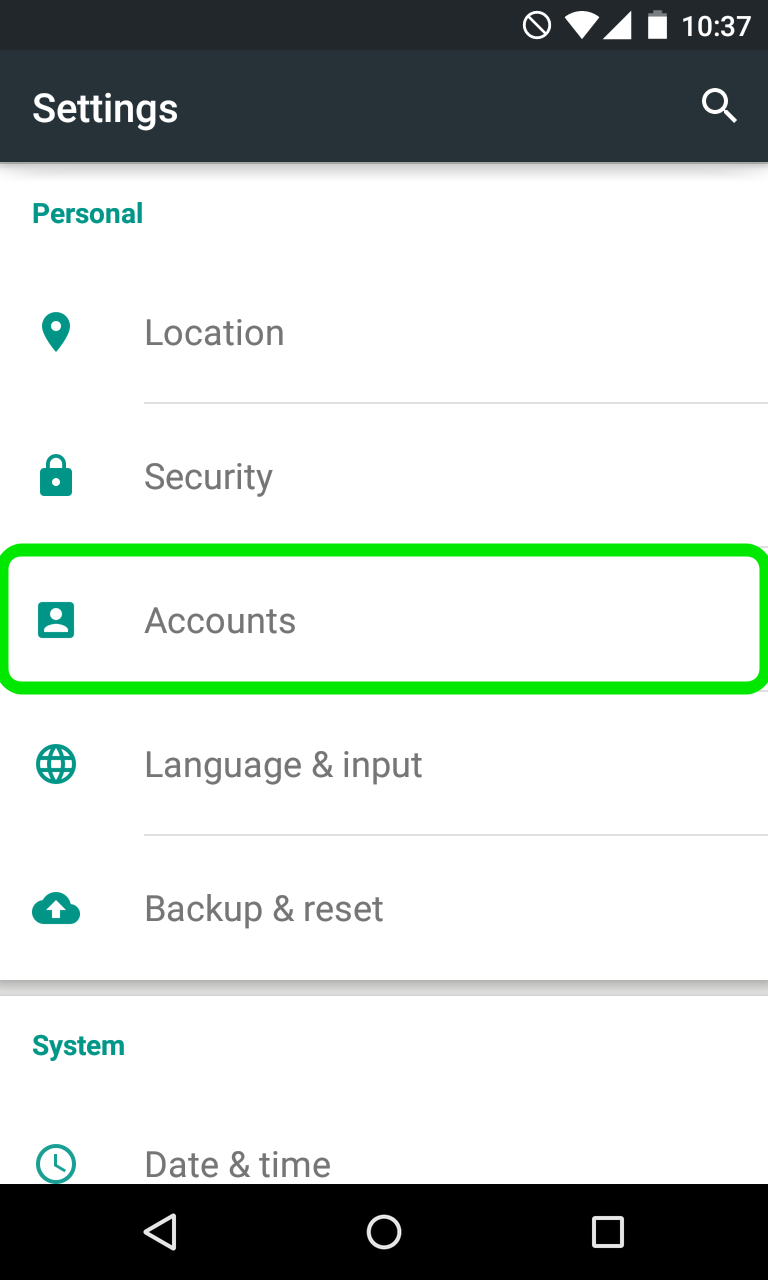
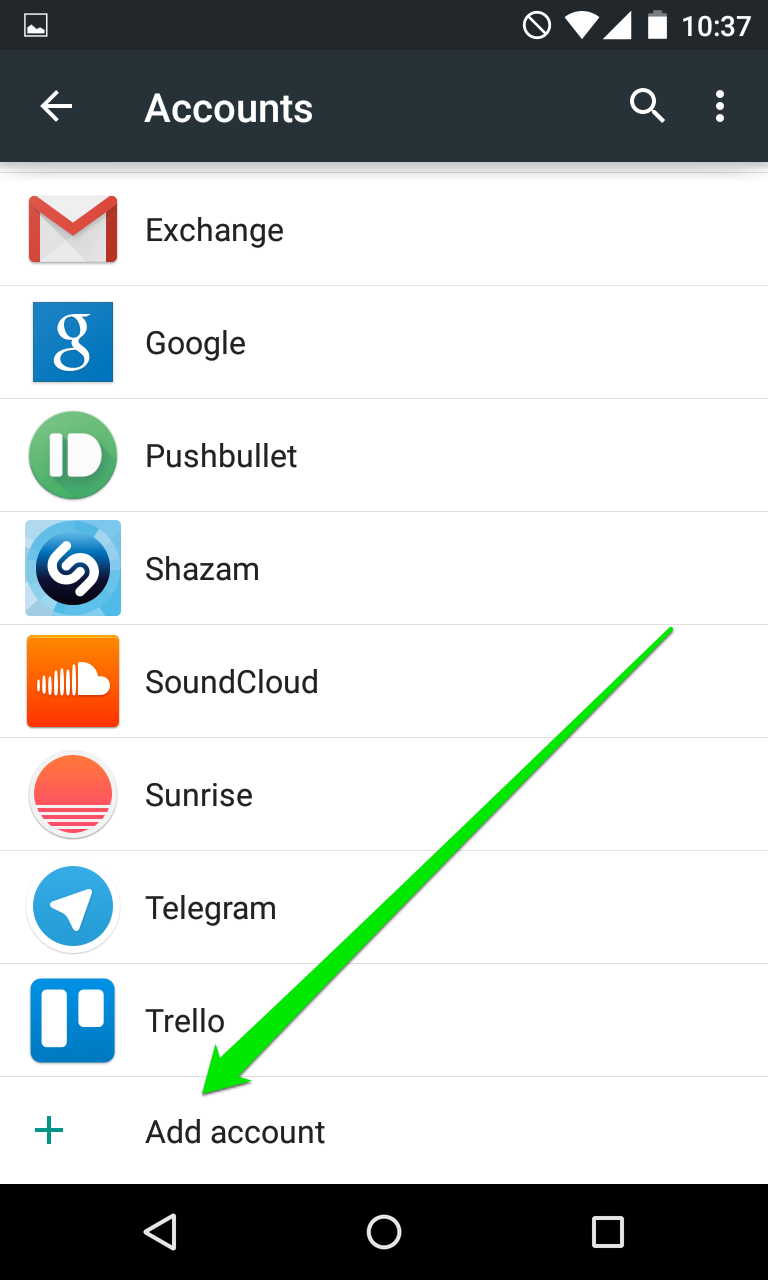
- Tap on Add account at the very bottom of the screen.
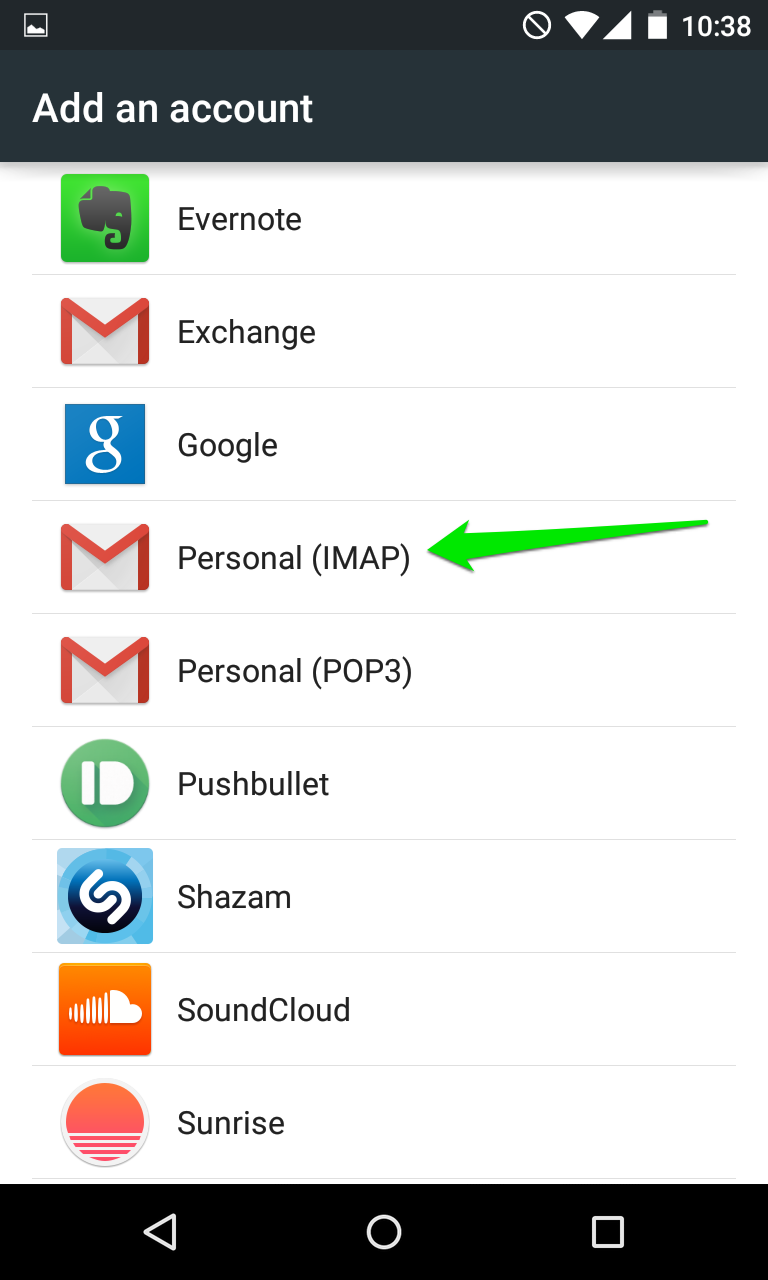
- Tap Personal (IMAP).
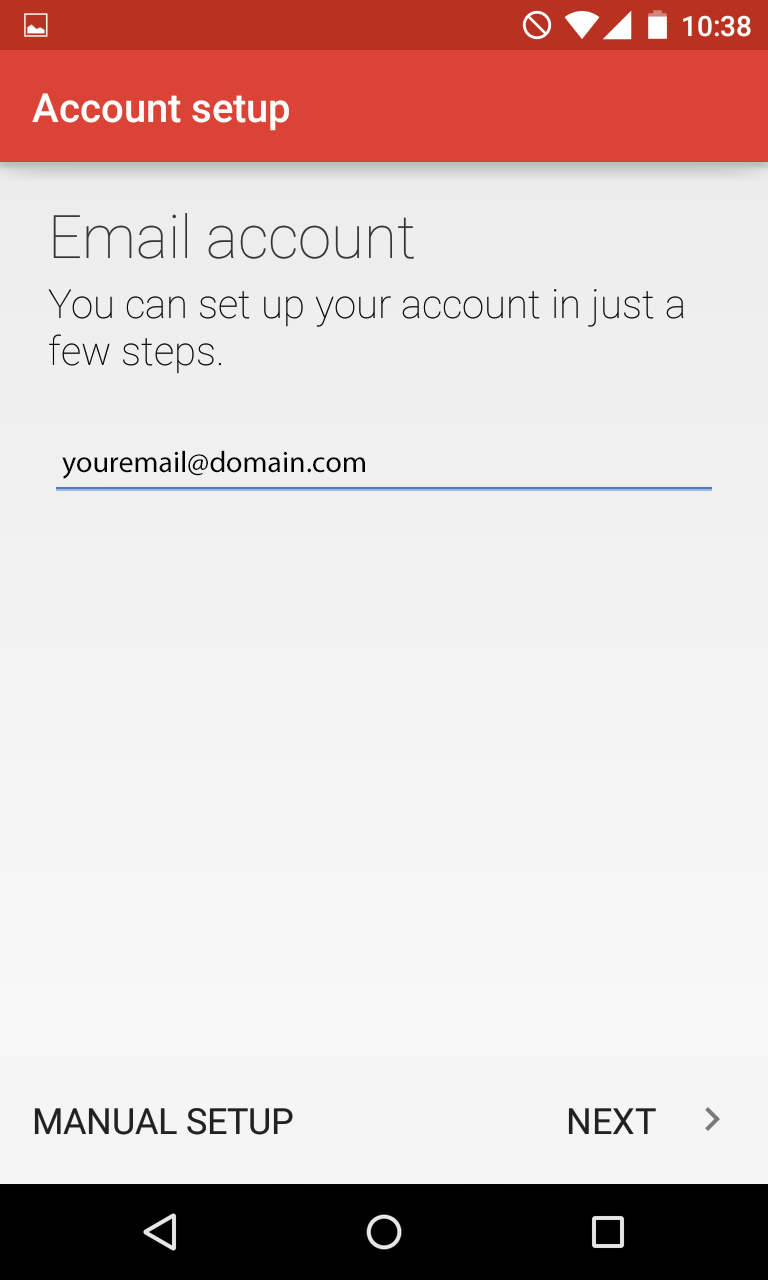
- Enter your full email address, then tap Next.
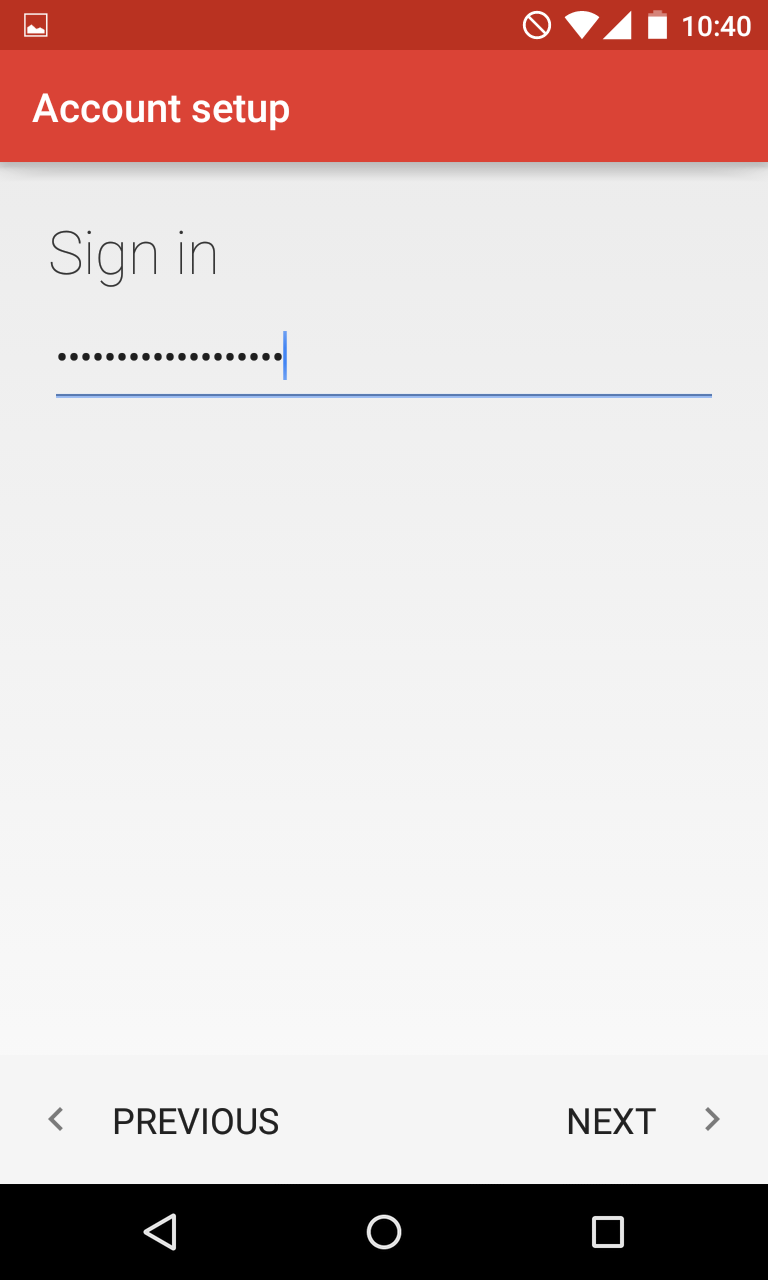
- Enter your password, then tap Next.
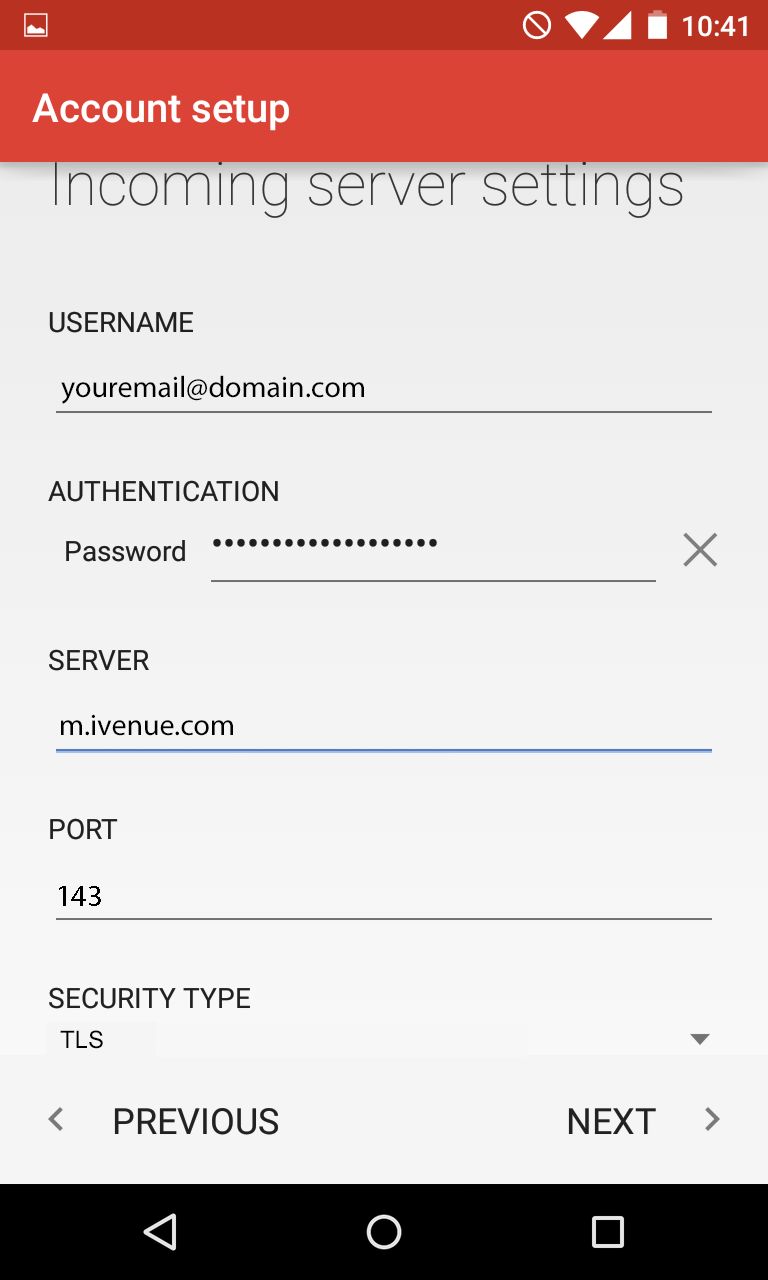
- Enter your full email address as the Username. Enter your password. The Server should be m.ivenue.com. The Port should be 143. Security Type should be TLS. Click Next and proceed to Outgoing Server.
- SMTP Server should be m.ivenue.com. Port should be 587. Security Type should be TLS.
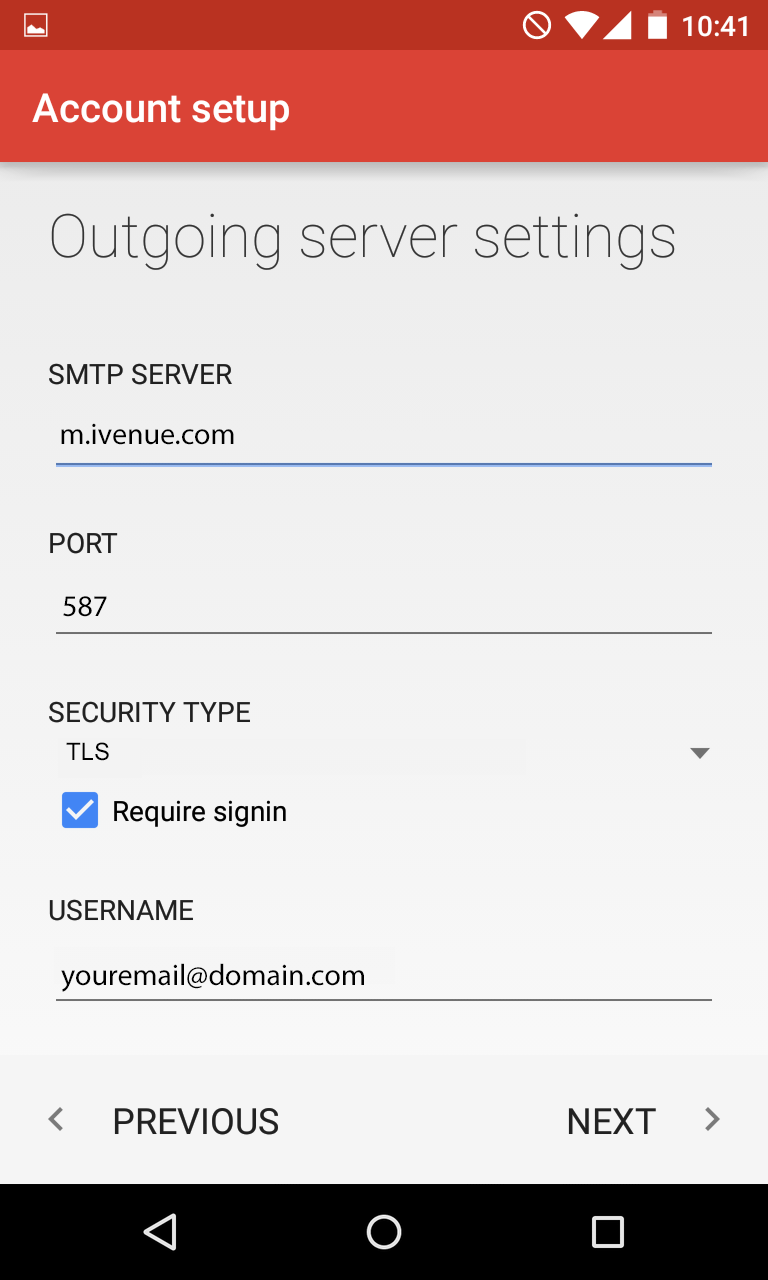
- Once ready, tap Next to verify SMTP settings and finish the account setup.
- Open Outlook. If you've never used it before, it will prompt you to create a new account. Otherwise, click the File tab, then Add Account.

- Choose Manual setup or additional server types, then click Next.

- Choose POP or IMAP, then click Next.

- Enter Your Name and Email Address. Account Type should be IMAP. Incoming mail server and Outgoing mail server should be m.ivenue.com. User Name should be your full email address. When you're finished, click More Settings.

- Click the Outgoing Server tab, then choose Use same settings as my incoming mail server.

- Click the Advanced tab. Incoming server should be 143, Outgoing server should be 587. Enter "Inbox" for Root folder path. Both Use the following type of encrypted connection boxes should be set to None. Click OK.

- Click Next. Outlook should tell you that all tests completed successfully. Click Close to finish.
- Open Apple Mail. If you've created an account before, click Mail and select Add Account. Otherwise, skip to the next step.

- Choose Add Other Mail Account, then click Continue.

- Fill out your Full Name, Email Address, and Password, then click Create. If you see a message that Account must be manually configured, click Next.

- Choose IMAP. Mail Server should be m.ivenue.com. User Name should be your full email address. Enter your password and click Next.

- SMTP Server should be m.ivenue.com. User Name should be your full email address. Enter your password and click Create.

- Open Windows Live Mail. Select Add e-mail account from the left side.

- Enter your full Email address, Password, and Display Name. Click Next.

- Select IMAP from the drop-down box. Incoming server and Outgoing server should be m.ivenue.com. The first Port should be 143, the second Port should be 587. Login ID should be your full email address. The only checkbox that should be checked is My outgoing server requires authentication. Click Next.

- Click Finish.

- On the first page after logging into webmail, without clicking Access Your Webmail, instead click Edit Your Webmail Autoresponder
- Check the box to Enable Autoresponder
- Choose between Only reply to the first email from each sender, Only reply once every 7 days to each sender, and Reply to every email
- Enter a Subject for the email that gets sent out
- Enter Message Text for the email that gets sent out
- Click Save.
